 how-to
Tiered Garden Beds on Slopes: A 2026 Guide
Table of Contents
- Why Tiered Garden Beds Beat a Single Slope
- Assessing Your Slope Before You Dig
- Planning With 3D Landscape Design for Sloped Properties
- Retaining Wall Construction for Sloped Yards: The Core Structure
- Landscape Drainage Solutions for Hillsides
- Step-by-Step: Building Your Tiered Garden Beds
- Planting and Maintaining Your Terraced Beds
- Conclusion: Start Your Sloped Garden Project
- Frequently Asked Questions
Last Updated: September 9, 2026
Why Tiered Garden Beds Beat a Single Slope
A sloping backyard often gets treated as a problem to flatten. That instinct costs homeowners dearly in excavation and fill. The smarter move is working with the gradient, not against it, by integrating tiered garden beds into sloped landscapes. This approach transforms an awkward incline into a series of usable, productive planting spaces. Integrating tiered garden beds can transform wasted slopes into a valuable part of the property.
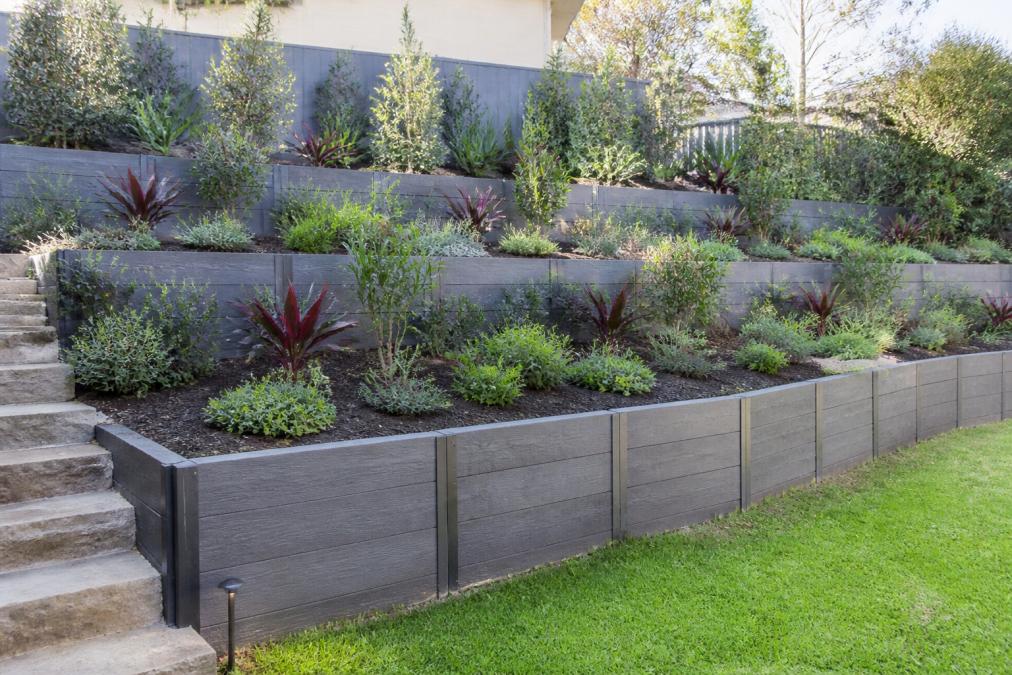
Tiered garden beds are stepped planting areas supported by retaining structures, built progressively up a slope. Each level holds its own soil profile, which prevents the topsoil runoff that plagues single-slope planting. Beyond erosion control, terracing creates flat, walkable zones for planting, seating, or vegetable growing. You also gain deeper, healthier root zones than a thin layer of soil on a hillside could ever provide.
Most guides miss the real payoff: tiered beds capture water where it falls. Instead of racing down the slope, rainfall soaks into each level, cutting irrigation demand noticeably during dry Sydney summers.
Assessing Your Slope Before You Dig
Start by measuring the gradient accurately, because every downstream decision depends on it. Use a string line and spirit level stretched over a known horizontal distance, then measure the vertical drop. Divide the drop by the run and multiply by 100 to get the slope percentage. A slope under 10 percent may suit simple raised garden beds, while anything steeper demands proper terracing with engineered retaining walls.
Check the soil type while you are at it. Sandy soils drain freely but hold little moisture, while heavy clay holds water and builds hydrostatic pressure behind any wall. Both extremes change your drainage design and material choices. The gradient measurement also determines footing depth and wall height, which directly affects whether council approval is needed. Requirements vary between councils, so confirm early whether your project falls under exempt development or needs a formal application.
Planning With 3D Landscape Design for Sloped Properties
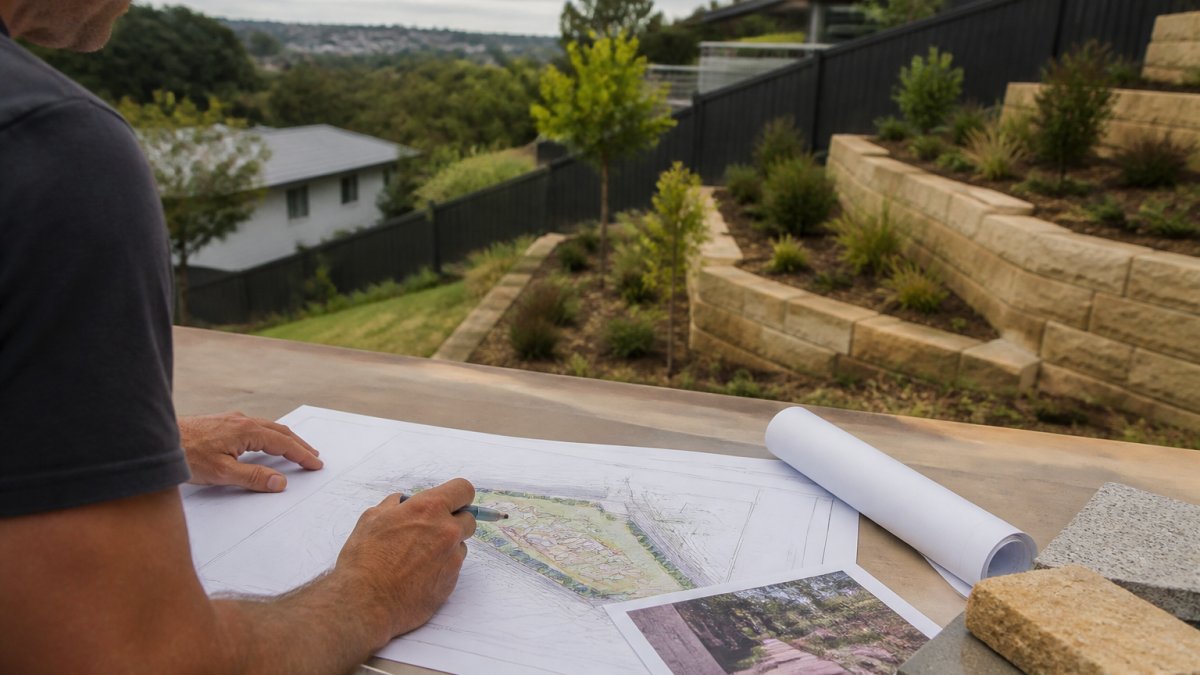
Once you know the slope, visualise the finished result before committing to construction. 3D landscape design for sloped properties lets you test bed widths, step heights, and planting schemes digitally, saving expensive mistakes in the ground. This is where landscape architecture earns its keep, balancing structural integrity with how the space will actually feel and function.
A good design resolves the details that cause headaches later: where steps go, how paths connect each tier, and how irrigation will reach every level. For high-gradient slopes, structural engineering input is worth the investment. An engineer calculates the loads the retaining structure must resist, including soil weight, water pressure, and any surcharge from structures above. Guessing at this stage leads to failed walls and costly rework.
The design phase also settles the material palette. Timber sleepers suit informal, garden-friendly looks and are straightforward to work with. Stone masonry and concrete block offer greater longevity and a more formal appearance. Your choice affects cost, maintenance, and how the tiers integrate with the house and existing landscaping.
Retaining Wall Construction for Sloped Yards: The Core Structure
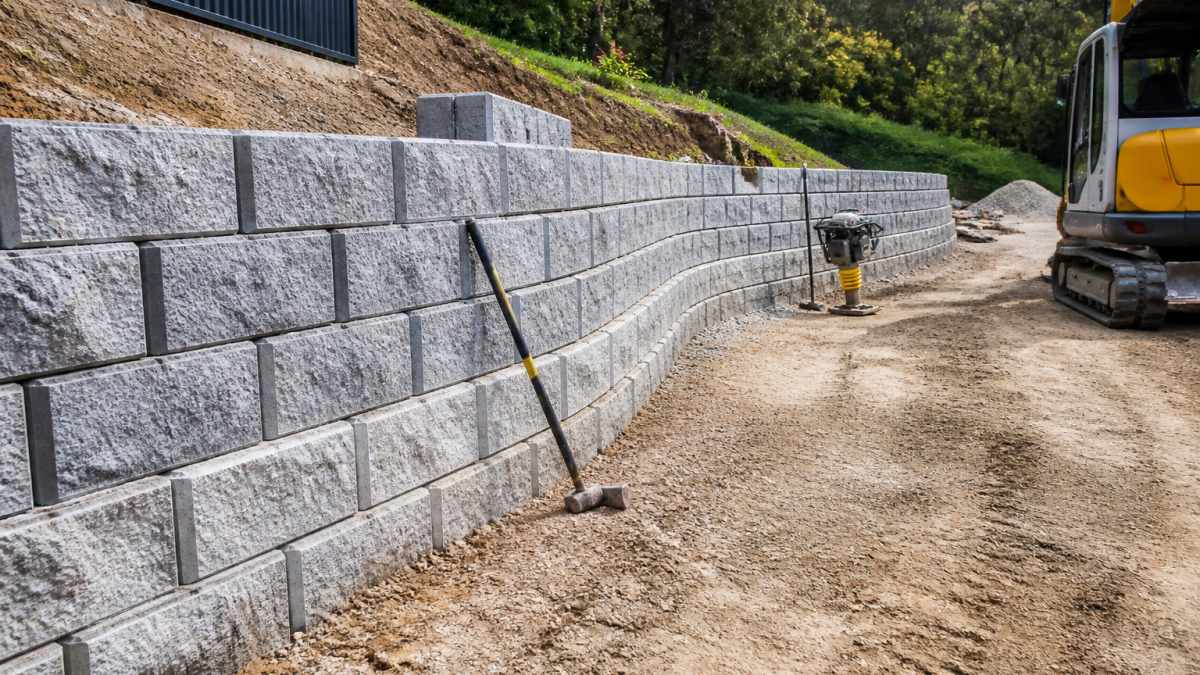
Retaining wall construction for sloped yards is the backbone of any terracing project. The wall holds back the soil of the upper tier, so its footing, drainage, and backfill determine whether your garden beds survive the years. Every wall needs a solid foundation base, typically compacted road base or concrete, dug below the frost line and sized for the wall height.
Proper drainage behind the wall is non-negotiable. Install aggregate backfill and perforated drainage pipe to relieve hydrostatic pressure, the force exerted by waterlogged soil. Weep holes in the wall face provide an additional escape route for water. Skip these, and a heavy rain event can push the wall outward. Geotextile fabric separates the drainage aggregate from the surrounding soil, preventing fines from clogging the system over time.
The Engineering Reality on Steep Grades
Most DIY guides stop at 'build a wall,' but on a genuine slope, the forces at play are substantial. A 1.8-metre-high wall retaining saturated clay soil can exert a lateral force of several tonnes per metre of wall length. This is not a situation where guesswork is acceptable. For any wall over one metre, or on slopes exceeding 20 percent, the structural design should be reviewed by a practicing structural engineer. They will calculate the active soil pressure, account for surcharge loads from anything above the wall, and specify the required footing width and depth.
A common pattern for taller residential walls is a reinforced concrete footing with a masonry or interlocking block face, reinforced with steel rebar and filled with concrete. Another engineered solution is mechanically stabilised earth (MSE) using geogrid layers. Geogrids are high-strength polymer sheets laid horizontally into the backfill behind the wall. They extend deep into the slope, anchoring the wall mass to the soil behind it. This allows for taller walls without the mass of a traditional gravity structure. On very steep sites, soil nails or ground anchors driven into the undisturbed slope can provide additional stability.
Material Selection: A Trade-Off, Not a Choice
The material you choose is a trade-off between structural capacity, longevity, appearance, and cost. Timber sleepers, often treated pine or hardwood, are a popular choice for lower garden walls. They are relatively inexpensive and easy to work with, but they are a structural compromise. They are susceptible to decay and movement, and their lifespan is typically shorter than masonry. For a tiered system on a real slope, timber is best limited to low, non-critical garden edges.
Concrete sleepers offer a step up in durability and structural integrity. They are precast, reinforced, and designed to handle significant soil pressure. They install quickly and present a clean, modern look. Stone masonry, whether dry-stacked or mortared, offers the most aesthetic appeal and longevity, but it is the most expensive and requires skilled labour. For a high-gradient slope where failure is not an option, a properly engineered concrete block or masonry wall is the safer, long-term investment.
Geotechnical Reality Check
Before construction, it is wise to consider the bearing capacity of the soil at the base of your slope. If you are building on fill or soft clay, the footing may need to be wider or deeper to distribute the wall's weight and the retained soil's pressure. A simple test is to dig a trial pit and inspect the soil. If it is loose, dark topsoil down to a significant depth, you will likely need to excavate to firmer material or use a wider footing. Ignoring this is a leading cause of wall settlement and failure in the first few years. For complex sites, a geotechnical report from an engineer is a prudent investment that protects the entire project.
Landscape Drainage Solutions for Hillsides
Water management decides the success of any sloped garden. Landscape drainage solutions for hillsides must handle both surface water runoff and subsurface groundwater. Surface water needs controlled paths, such as swales or channel drains at the top of the slope, intercepting runoff before it reaches the beds. Subsurface water requires the aggregate and pipe systems built into each wall's backfill.
Each tier should slope slightly toward its drainage outlet, preventing water from ponding against the uphill wall. Connect tier drainage to a common outlet at the slope's base, directing water away from the house foundation and into the stormwater system or a garden absorption area. On heavy clay sites, consider a deeper aggregate trench behind the walls to capture more subsurface flow.
Designing an Irrigation System for a Stepped Garden
Irrigation integration is the angle most DIY guides overlook, yet it is the difference between a thriving terraced garden and a constant battle with a hose. Watering a slope from above is inefficient; runoff is inevitable. The professional solution is a well-planned, zoned drip irrigation system installed during construction, before backfilling. This saves significant effort compared with retrofitting later.
The key principle is to create a separate irrigation zone for each tier. This allows you to tailor watering schedules to the specific needs of the plants and the microclimate of each level. Upper tiers, which are more exposed to sun and wind, will need more frequent watering than the shaded, moisture-retentive lower tiers.
A gravity-fed system from a rainwater tank at the top of the slope is an efficient and sustainable option. The natural head pressure from the elevated tank can feed the drip lines on the lower tiers without a pump. For the system to work, the tank's outlet must be positioned above the highest point of the irrigation lines. Each tier's line should have its own valve so you can isolate it for maintenance or adjust its flow.
For most installations, a pressure-compensating drip line is the most reliable choice. Unlike standard drip line, pressure-compensating emitters deliver a consistent flow rate regardless of changes in elevation along the line. This is critical on a slope where pressure can vary significantly from the top of a tier to the bottom. Run the drip lines along the contour of each bed, spacing them according to the plant density and soil type.
Installation Sequence and Key Details
The most effective time to install the irrigation is during the construction of each tier, before the final layer of topsoil is placed. This allows you to bury the main supply lines and run the drip lines directly under the mulch, protecting them from sun damage and accidental knocks. Use a pressure-reducing valve at the water source to protect the system from high mains pressure.
Each tier should have a manual isolation valve so you can shut off one level without affecting the others. This is invaluable for maintenance or if you decide to change the planting in a single bed. Consider installing a simple battery-operated timer at the tap to automate the watering schedule, which is particularly useful during the hot, dry summer months. A well-designed system not only saves water but also prevents the foliar diseases that can occur when overhead sprinklers wet the leaves of plants on a humid evening.
Step-by-Step: Building Your Tiered Garden Beds
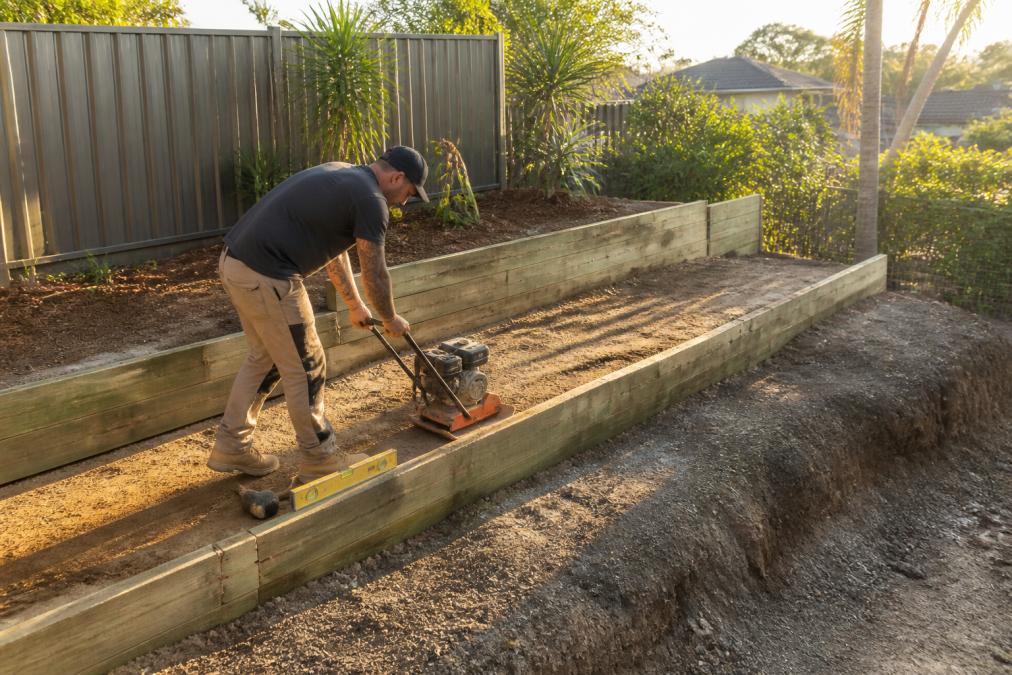
Follow this sequence for a stable, long-lived result. Adjust depths and materials to your site conditions and council requirements.
- Excavate the first tier. Cut into the slope to create a level bench, removing topsoil and soft material down to firm ground.
- Dig the footing trench. The trench should sit below the finished grade, wide enough for your chosen foundation base.
- Pour or compact the footing. Compact road base in layers, or pour a concrete strip footing, levelling carefully along its length.
- Lay the first wall course. Set your sleepers, blocks, or stone on the footing, checking level in both directions as you go.
- Install drainage. Place perforated pipe behind the wall at footing level, surrounded by aggregate, with geotextile fabric separating it from the soil.
- Backfill and compact. Fill behind the wall in thin layers, compacting each to prevent future settling. Never dump and compact loose fill in one go.
- Build subsequent tiers. Repeat the process up the slope, stepping each wall so the top of the lower wall aligns with the base of the next tier.
- Finish with topsoil. Add quality topsoil and soil amendment to each bed, then allow settlement before final planting.
Planting and Maintaining Your Terraced Beds
With the structure complete, planting turns the terraces into a productive garden. Choose perennials suited to your aspect, sun exposure, and the microclimate of each tier. The upper tiers dry out faster, so they suit drought-tolerant species, while lower tiers hold more moisture and can support thirstier plants. Group plants by water needs to simplify irrigation scheduling.
Mulch each bed generously to suppress weeds and slow evaporation, a critical step on exposed slopes. Replenish mulch annually as it breaks down. Monitor the drainage outlets and weep holes each season, clearing any blockage from soil or roots. Inspect walls after heavy rain for movement or bulging, catching problems early while they remain inexpensive to fix.
Conclusion: Start Your Sloped Garden Project
Integrating tiered garden beds into sloped landscapes turns a frustrating gradient into a structured, productive, and genuinely attractive garden. The process demands careful planning, honest assessment of your slope, and proper construction of the retaining structures and drainage that make it all work. Get those fundamentals right, and your terraced beds will perform for decades.
Every slope presents its own conditions, from soil type to council requirements, so professional guidance protects your investment. FDSS landscaping and building services brings end-to-end experience to sloped properties across the Hills District, North-West Sydney and Greater Sydney, from concept and 3D landscape design through excavation, retaining wall construction, drainage and planting.
Frequently Asked Questions
How do you level tiered garden beds on a steep slope?
Start by establishing a level reference line across the slope using string lines and a spirit level. Excavate the high side of each terrace to create a flat base, then build the retaining wall footing on compacted road base. Each tier should step down the slope, with the wall height determined by the gradient. For steep slopes, consider shorter walls of 400-600 mm to reduce pressure and simplify construction.
What materials are best for retaining walls in tiered garden designs?
Timber sleepers are a popular choice for many residential projects. Concrete blocks and stone masonry offer greater structural integrity for taller walls or high-gradient slopes. The best choice depends on your soil type, wall height, and the look you want. Always use galvanised or stainless steel fixings and consider geotextile fabric behind the wall to separate soil from drainage aggregate.
Do I need council approval for terraced garden beds in my area?
Requirements vary across councils in the Hills District and Greater Sydney. Retaining walls over a certain height, often 600 mm to 1 metre, typically need engineering certification and a complying development certificate or council approval. Underground drainage connections may also require approval. Check with your local council before starting, since rules depend on your specific site and the proposed wall height.
How does proper drainage impact tiered garden construction?
Drainage is the main factor that separates a stable terrace from one that fails. Without it, water builds up behind the retaining wall, creating hydrostatic pressure that can crack or push the structure over time. Install an aggregate backfill with a perforated drainage pipe at the base of each wall, and direct water runoff away from the beds. Weep holes in the wall face provide an additional outlet.
Ready to make your slope work for you? Request a landscaping quote from FDSS Landscaping Services and get a design tailored to your property's gradient, soil, and outlook.