 how-to
Retaining Wall Drainage Solutions for Slopes
Table of Contents
- Why Slope Retaining Walls Need Dedicated Drainage
- Understanding Hydrostatic Pressure and Wall Failure
- Core Components of a Drainage System
- Retaining Wall Drainage Pipe Installation Steps
- Retaining Wall Engineering Requirements for Sloped Sites
- Drainage Mistakes That Lead to Expensive Repairs
- When to Call a Professional for Slope Drainage Design
- Conclusion
- Frequently Asked Questions
Last Updated: September 4, 2026
Why Slope Retaining Walls Need Dedicated Drainage
A retaining wall on a slope is holding back water as much as soil. Drainage solutions relieve the hydrostatic pressure that builds up behind the wall after rain, and without them, even a well-built wall will eventually fail. The team at FDSS landscaping and building services has constructed retaining walls across the Hills District and North-West Sydney, and we understand the consequences of poor drainage planning.
When soil becomes saturated, its weight increases dramatically and lateral pressure on the wall multiplies. This guide explains the drainage components, installation sequence, and engineering considerations that keep a slope retaining wall stable for decades.
Understanding Hydrostatic Pressure and Wall Failure
Hydrostatic pressure is the force exerted by standing water against a structure, and it is the primary cause of retaining wall failure on slopes. When rainwater soaks into the backfill, it cannot escape through the impermeable wall face. The trapped water pushes against the structure with force that increases with depth, creating pressure far greater than the weight of the soil alone.
Signs of a wall struggling with poor drainage are usually visible before catastrophic failure: cracks running horizontally or diagonally, a wall that bows or leans outward, bulging sections between supports, or soil washing out around the base. Efflorescence, a white chalky residue on the wall face, indicates water is migrating through the concrete or blocks. When these symptoms appear, the drainage system has likely failed.
Core Components of a Drainage System
An effective system combines several elements that work together to collect and redirect water: a perforated pipe, drainage gravel or aggregate, geotextile filter fabric, and a clear outlet path.
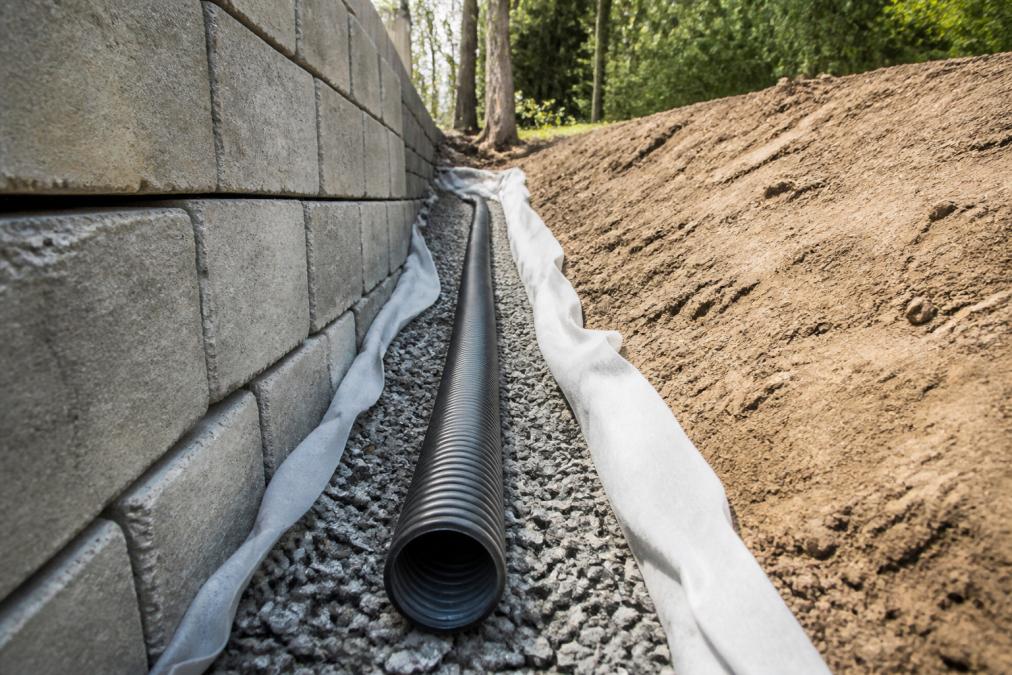
The perforated pipe is the backbone of the system. Laid along the base of the wall, it collects water that drains down through the backfill and carries it to a safe discharge point. The drainage gravel, typically 20mm blue metal or similar clean aggregate, surrounds the pipe and creates a high-permeability zone for water to flow freely downward. Geotextile filter fabric wraps the gravel to prevent fine soil particles from migrating into the drainage zone and clogging it over time.
Weep holes provide an additional escape route through the wall face itself, allowing water to exit if the base drainage becomes overwhelmed. A well-designed system routes water to a drainage outlet, stormwater connection, or a low point in the landscape where it can disperse safely without eroding the slope below.
| Component | Function | Common Mistake |
|---|---|---|
| Perforated pipe | Collects and redirects groundwater | Installed without proper slope |
| Drainage gravel | Creates high-permeability zone | Using sand or fine fill instead |
| Geotextile fabric | Prevents soil clogging the system | Omitting fabric entirely |
| Weep holes | Relieves pressure through wall face | Placed too high to be effective |
| Drainage outlet | Discharges water safely away | Letting water pond at wall base |
Retaining Wall Drainage Pipe Installation Steps
Proper installation follows a clear sequence, and each step matters for the long-term performance of the wall on a slope. Getting the details right, trench dimensions, material specifications, and fall ratios, separates a system that works for decades from one that fails within a few seasons.
Step 1: Prepare the foundation trench. Excavate a level base trench wide enough for the wall footing plus the drainage zone behind it. For a standard block wall, this typically means a trench roughly 600mm wide, 400mm for the footing and an additional 200mm behind it for the drainage aggregate. On sloped sites, the trench base must be cut into stable ground, never built on loose fill, and must fall consistently toward the outlet location.
Step 2: Lay the wall footing. Pour or set the footing according to the engineered design, allowing the correct width and depth for the wall height. A common footing for a 1-metre wall is 400mm wide and 200mm deep, but this varies with soil conditions and wall type. The top of the footing should sit below finished ground level so the first course of blocks is partially buried.
Step 3: Place the first course of blocks or panels. The base course must be perfectly level, as every subsequent course follows its line. Use a spirit level across both axes and check against a string line, a 5mm error at the base becomes a visible lean at the top of a 1-metre wall.
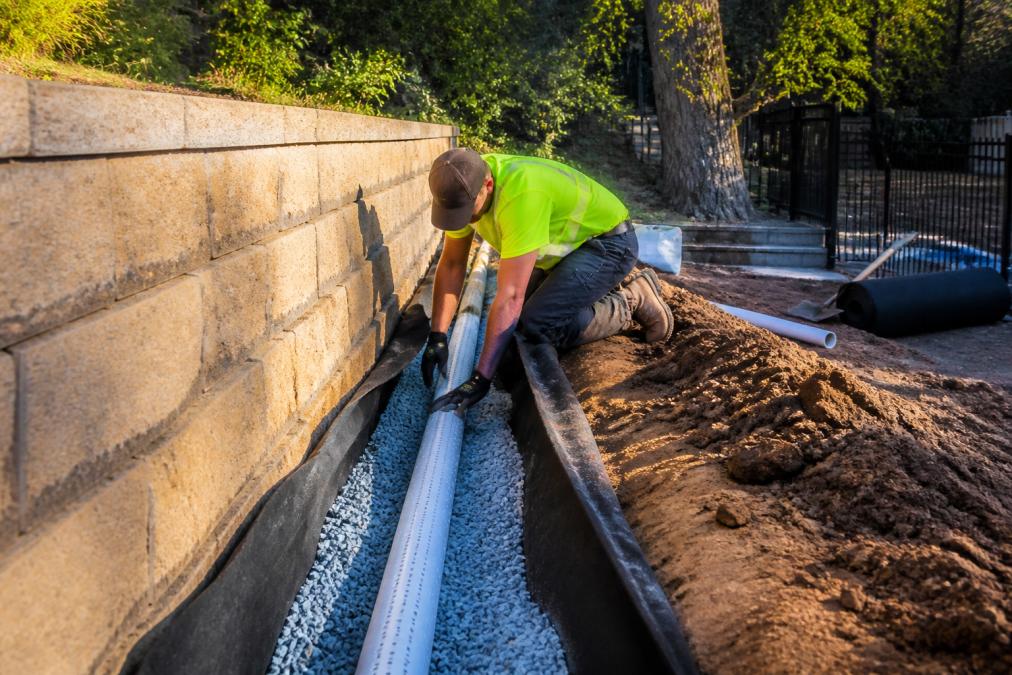
Step 4: Install the perforated pipe. Lay the pipe along the back of the footing with the perforations facing downward, holes facing down collect water from below rather than allowing sediment to settle into them from above. Use 100mm diameter perforated agricultural pipe (AG pipe) or slotted PVC pipe, depending on the wall design and expected water volume. The pipe must have a consistent slope of roughly 1:50, or about 20mm per metre, toward the drainage outlet. Check the fall with a string line and level before backfilling.
Step 5: Wrap the pipe in geotextile fabric. The fabric should line the trench sides and base, extending up the back of the wall cavity. Use a quality non-woven geotextile with suitable puncture resistance for the aggregate. The fabric lets water pass while holding back fine soil particles that would otherwise clog the drainage zone. Overlap joins by at least 300mm.
Step 6: Backfill with drainage gravel. Fill the space behind the wall with clean 20mm blue metal or similar washed aggregate, placing it in layers and compacting lightly. The gravel should extend from the footing base to within 300mm of the top of the wall. Do not use crusher dust, sand, or unwashed fill, these contain fines that will migrate into the pipe and block it. The drainage zone should be a minimum of 200mm wide behind the wall.
Step 7: Fold the fabric over the gravel. This closes the drainage zone and prevents surface soil from washing down into the aggregate. Overlap the fabric by at least 150mm at the top and secure it with landscape pins or by tucking it behind the backfill, creating a sealed envelope that only admits water, not soil.
Step 8: Backfill the remaining space with soil. Use suitable fill material and compact it in layers of no more than 150mm, compacting each layer before adding the next to prevent future settling. On sloped sites, shape this backfill to direct surface water away from the wall crest, a common oversight that sends runoff straight down behind the wall.
Step 9: Connect the outlet. Ensure the pipe discharges at a drainage outlet, stormwater connection point, or a low point in the landscape where water can disperse safely. Protect the outlet from blockages with a mesh cover or pop-up emitter, and use a splash pad or rock bed where it discharges onto the surface to prevent erosion. Connection to the stormwater system may require approval from the relevant council, so check requirements before finalising the outlet location.
A note on pipe bedding: some installers place the pipe directly on the compacted trench base, while others bed it in a shallow layer of gravel first. Bedding the pipe in 50mm of gravel provides more uniform support and reduces the risk of the pipe being crushed or distorted when the surrounding gravel is compacted. The additional cost is minimal, and the long-term reliability benefit is significant.
For taller walls or those on steep slopes, consider installing a second drainage pipe at mid-height. This intermediate drain intercepts water that would otherwise travel down the full height of the wall, reducing hydrostatic pressure at the base where it is most damaging. This approach is common in engineered designs for walls over 1.5 metres.
Retaining Wall Engineering Requirements for Sloped Sites
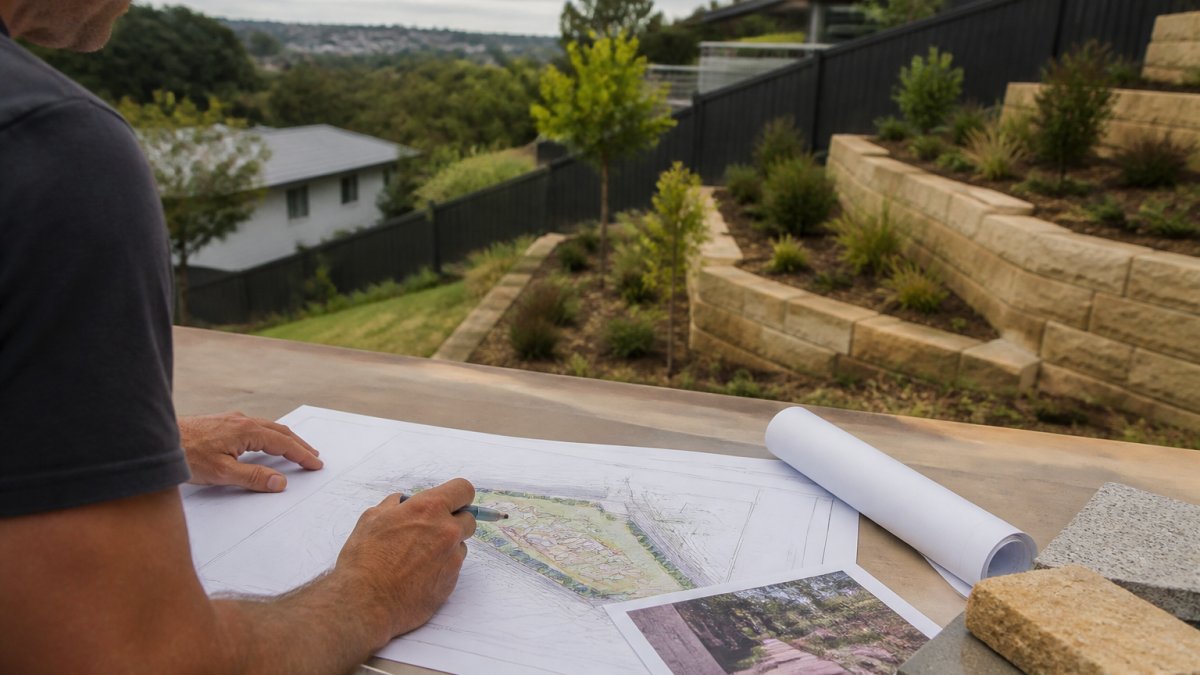
Retaining wall engineering requirements differ significantly on sloped sites compared to level ground, and this is where professional input becomes essential. A wall retaining a slope supports both the soil and any structures above it, including driveways, buildings, or neighbouring properties. The engineering design must account for the slope angle, soil type, groundwater conditions, and surcharge loads from anything above the wall.
In New South Wales, most retaining walls over 600mm in height require approval from the relevant council or authority. The specific requirements depend on the site, the wall location relative to boundaries, and the council's development control plan. Engineered designs are typically mandatory for walls above 1 metre or those supporting significant loads. Australian Standards relevant to earth-retaining structures and concrete construction will apply, but the exact compliance path depends on your site and council.
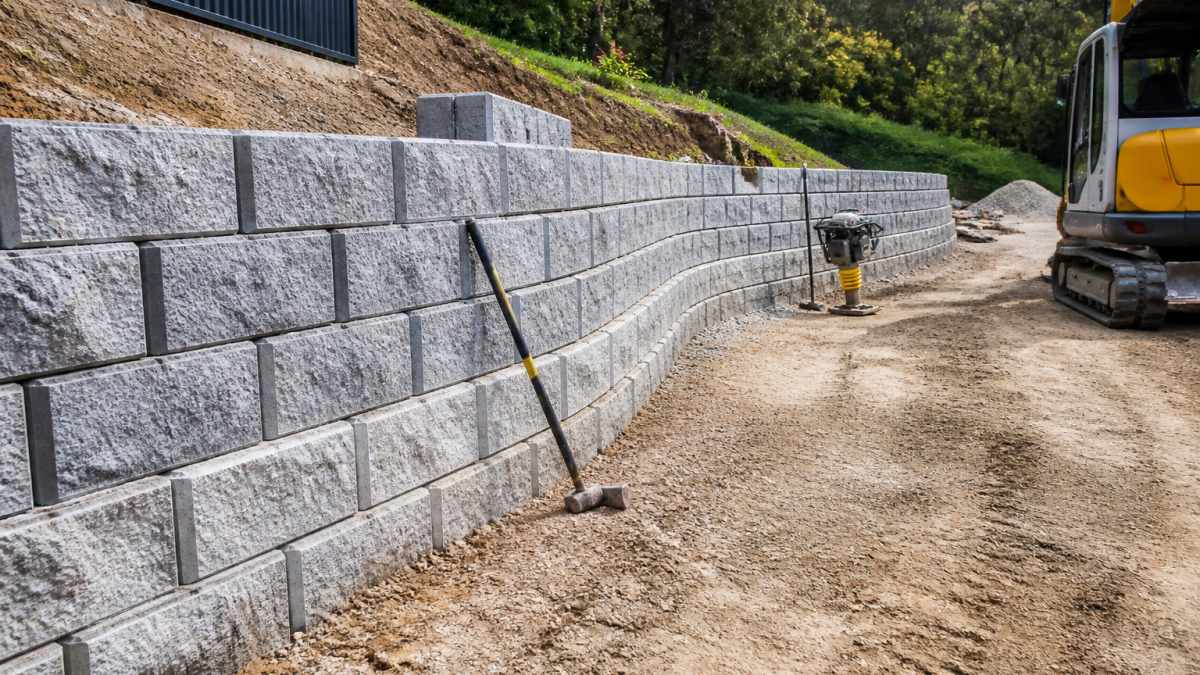
The engineering also determines the wall type itself. Gravity walls rely on mass for stability, cantilevered walls use a reinforced concrete base, and crib or gabion walls suit specific soil conditions. On steep slopes, a stepped or terraced wall design may reduce pressure and improve stability compared to a single tall wall.
Designing for Rainfall Patterns Across Greater Sydney
One factor that generic retaining wall guides overlook is how drainage design must respond to local rainfall patterns. Greater Sydney and the Hills District experience intense rainfall events alternating with dry periods, and this variability directly affects how a drainage system should be designed.
In the higher-rainfall areas west of the Georges River and through the Hills District, where annual rainfall regularly exceeds 900mm, drainage systems need to handle rapid, intense downpours. The key design consideration is not just the volume of water but the speed at which it arrives. A 100mm perforated pipe with a 1:50 fall may be adequate for a slow soak, but a sudden storm can overwhelm it. For slopes in these areas, consider upsizing the pipe to 150mm or adding a secondary surface drain at the crest of the wall. Larger aggregate (20mm rather than 10mm) also maintains higher permeability under pressure and is less likely to clog during heavy flow events.
In contrast, areas with lower rainfall but intense storm events, common in parts of Western Sydney, face a different challenge. Long dry periods allow the soil behind a wall to shrink and crack, creating preferential pathways for water during the first heavy storm of the season. This sudden influx can overwhelm a drainage system that has been dry and partially blocked by dust or debris. A geotextile-wrapped drainage zone becomes even more critical here, as it prevents cracked soil from washing into the gravel and creating voids that lead to wall settlement.
The seasonal pattern also affects outlet design. A drainage outlet that discharges onto the surface needs to handle the first flush of a storm after a dry period, which often carries leaf litter and debris. Fitting a removable mesh cover or using a cleanable pop-up emitter prevents blockages at exactly the time the system needs to work hardest.
Soil Types and Their Effect on Drainage Design
The soil behind your wall is as important as the wall itself. Across the Hills District and North-West Sydney, the dominant soil types vary significantly, and each requires a different drainage approach.
The clay-heavy soils common in parts of the Hills District and Western Sydney are among the most challenging for retaining wall drainage. Clay has very low permeability, meaning water does not drain through it readily. When clay becomes saturated, it expands and exerts enormous pressure on a retaining wall, far more than the design pressure for dry soil. For walls in clay conditions, the drainage system needs to intercept water before it saturates the clay. Ensure the drainage gravel zone extends the full height of the wall and that surface water is directed away from the wall crest before it can soak into the clay. In severe cases, a geocomposite drainage board applied directly to the back of the wall face can provide an additional drainage path.
Sandy or free-draining soils, found in some areas closer to the Hawkesbury River, present fewer drainage challenges but require attention to a different issue: the soil itself can wash through the drainage system. In these conditions, the geotextile fabric specification becomes critical. A fabric with an appropriate apparent opening size (AOS) will hold back the sand while still allowing water to pass. A fabric that is too open will allow sand to migrate into the gravel and gradually fill the voids, reducing the drainage zone's effectiveness over time.
Slope Angle and Surcharge Loads
The angle of the slope itself changes the engineering calculations. A wall retaining a 1-in-4 slope (approximately 14 degrees) experiences significantly different lateral pressures than a wall retaining a 1-in-1 slope (45 degrees). Steeper slopes also create challenges for construction access and compaction equipment. On very steep sites, a stepped or terraced wall design may reduce pressure and improve stability compared to a single tall wall.
Surcharge loads, anything sitting on the ground above the wall, must be included in the engineering design. A driveway, shed, or even a large tree near the wall crest adds significant lateral pressure. The drainage system must also handle the additional water that hard surfaces above the wall generate. A concrete driveway above a wall, for example, concentrates runoff into a small area, potentially overwhelming a drainage system sized only for natural rainfall. In these situations, a surface drain at the base of the driveway, connected to the wall's drainage outlet, is often necessary.
Drainage Mistakes That Lead to Expensive Repairs
Several recurring mistakes undermine retaining wall drainage systems, and most are preventable with careful planning. The most common error is backfilling with the wrong material. Using excavated clay soil or fine fill behind a wall instead of clean gravel prevents water from draining, essentially guaranteeing hydrostatic pressure will build up.
Another frequent problem is installing the perforated pipe without a consistent slope. If the pipe dips or levels out, water sits in the low point and the system fails silently. Equally damaging is directing the pipe outlet to a place where water cannot escape, such as against a solid boundary or into already-saturated ground.
Omitting the geotextile fabric is a third issue that shows up years later. Without the fabric, fine soil particles wash into the gravel and gradually clog the drainage zone, turning what should be a free-draining layer into a water-retaining one. Other mistakes include placing weep holes too high to drain effectively, failing to compact backfill in layers, and installing the wall too close to the slope crest where it lacks adequate embedment.
A summary of the key mistakes and their consequences:
| Mistake | Consequence | Prevention |
|---|---|---|
| Clay backfill instead of gravel | Trapped water, high pressure | Use clean 20mm aggregate |
| Pipe without fall | Standing water in pipe | Slope pipe at 1:50 minimum |
| No geotextile fabric | Clogged drainage zone | Wrap gravel in filter fabric |
| Poor outlet placement | Water cannot escape | Route to stormwater or low point |
| No compaction of fill | Settling and wall movement | Compact in 150mm layers |
When to Call a Professional for Slope Drainage Design
Knowing when to bring in a professional can save you from an expensive failure. For walls under 600mm on gentle slopes with free-draining soil and no structures above, a competent DIY approach may be acceptable. However, the moment the project involves a wall over 1 metre, a steep slope, poor drainage soil, or any structure above the wall, professional design and construction become necessary.
A professional landscape construction team brings experience with site conditions across the Hills District, including the clay-heavy soils common in parts of North-West and Western Sydney. We understand how seasonal rainfall affects sloped sites and how to integrate drainage with the broader landscape, including surface grading, stormwater management, and connection to existing irrigation systems. The design-and-build approach used by FDSS landscaping and building services means one team handles the engineering coordination, council approval process, and construction, ensuring the drainage system is designed and built correctly from the start.
The cost of engaging professionals is modest compared to the expense of rebuilding a failed wall, repairing damaged landscaping, or managing a dispute with a neighbour over water runoff. For retaining walls on slopes, the drainage system is not an optional extra; it is the difference between a structure that lasts and one that slowly destroys itself.
Conclusion
Retaining wall drainage solutions for slopes are not a technical afterthought; they are the core reason a wall survives the test of time and weather. Hydrostatic pressure from trapped water is the enemy of every retaining structure, and a properly designed drainage system with perforated pipe, gravel, geotextile fabric, and a clear outlet is the only reliable defence.
If you are planning a retaining wall on a sloped property in Castle Hill, Baulkham Hills, Kellyville, Rouse Hill, or anywhere across the Hills District and Greater Sydney, the engineering and drainage decisions should be made before construction begins, not after problems appear. FDSS landscaping and building services provides complete landscape design and construction, including retaining walls engineered for your site conditions. Our integrated team handles everything from concept and 3D design through to construction and completion.
Request a landscaping quote from FDSS Landscaping Services to discuss your project and get a drainage solution designed for your slope.
Frequently Asked Questions
Is drainage behind a retaining wall necessary in Australia?
Yes, drainage behind a retaining wall is essential in almost all Australian conditions. Without it, water builds up in the backfill, creating hydrostatic pressure that can push the wall forward, cause cracks, or lead to structural failure. Proper drainage, including a perforated pipe and gravel backfill, manages water runoff and protects the wall's structural integrity. The specific requirements depend on your site, soil type, and wall height, so local engineering and council conditions should always be checked.
What are common retaining wall drainage mistakes?
Common mistakes include using fine sand or clay as backfill, which blocks water flow instead of draining it. Another is forgetting to wrap the drainage aggregate with geotextile filter fabric, allowing soil to clog the pipe. Failing to provide a positive outlet for the drainage pipe or not sloping the pipe correctly also causes water to pool. Skipping compaction of the backfill layers can lead to settlement and added pressure on the wall.
How do you manage water runoff on a sloped block?
Managing runoff on a slope starts with intercepting water before it reaches the wall. A swale or spoon drain at the top of the slope can divert surface water. Behind the wall, a subsurface drainage system with a perforated pipe and drainage gravel collects groundwater. At the base, a drainage outlet must direct water safely away to a stormwater point or lower garden area. Proper surface grading across the slope also prevents pooling and uncontrolled flow.
What are the retaining wall engineering requirements for a sloped site?
Walls over 800mm to 1 metre in height, or those supporting a slope, generally need engineering design in NSW. An engineer assesses soil conditions, wall loads, and groundwater to specify the footing, reinforcement, and drainage requirements. The design must comply with relevant Australian Standards and council requirements. Approval requirements vary by council, so you must confirm what applies to your property. A structural engineer's certification is often required before construction begins.
Frequently Asked Questions
Q: Is drainage behind a retaining wall necessary in Australia?
A: Yes, drainage behind a retaining wall is essential in almost all Australian conditions. Without it, water builds up in the backfill, creating hydrostatic pressure that can push the wall forward, cause cracks, or lead to structural failure. Proper drainage, including a perforated pipe and gravel backfill, manages water runoff and protects the wall's structural integrity. The specific requirements depend on your site, soil type, and wall height, so local engineering and council conditions should always be checked.
Q: What are common retaining wall drainage mistakes?
A: Common mistakes include using fine sand or clay as backfill, which blocks water flow instead of draining it. Another is forgetting to wrap the drainage aggregate with geotextile filter fabric, allowing soil to clog the pipe. Failing to provide a positive outlet for the drainage pipe or not sloping the pipe correctly also causes water to pool. Skipping compaction of the backfill layers can lead to settlement and added pressure on the wall.
Q: How do you manage water runoff on a sloped block?
A: Managing runoff on a slope starts with intercepting water before it reaches the wall. A swale or spoon drain at the top of the slope can divert surface water. Behind the wall, a subsurface drainage system with a perforated pipe and drainage gravel collects groundwater. At the base, a drainage outlet must direct water safely away to a stormwater point or lower garden area. Proper surface grading across the slope also prevents pooling and uncontrolled flow.
Q: What are the retaining wall engineering requirements for a sloped site?
A: Walls over 800mm to 1 metre in height, or those supporting a slope, generally need engineering design in NSW. An engineer assesses soil conditions, wall loads, and groundwater to specify the footing, reinforcement, and drainage requirements. The design must comply with relevant Australian Standards and council requirements. Approval requirements vary by council, so you must confirm what applies to your property. A structural engineer's certification is often required before construction begins.