 how-to
How to Design an Outdoor Living Space: A Step-by-Step Guide
Table of Contents
- Define Your Outdoor Living Space Purpose
- Assess Your Site Conditions and Climate
- Understanding the Professional Landscape Design Process
- Outdoor Living Area Council Approval and DA Requirements
- Selecting Hardscaping Materials for Backyards
- Planning Alfresco Area Drainage Solutions
- Integrating Shade, Lighting and Entertaining Areas
- Conclusion: Bringing Your Outdoor Living Space to Life
- Frequently Asked Questions
Last Updated: August 15, 2026
Define Your Outdoor Living Space Purpose
Before you measure or order materials, clarify how you'll actually use the space. A stunning pergola means nothing if you never entertain, and an outdoor kitchen becomes expensive clutter if your household rarely cooks outside.
Ask yourself: Do you entertain groups regularly or seek a quiet retreat? Will children play here? How much time does your household realistically spend outdoors? These answers determine layout, shade requirements, material choices, and budget allocation.
In the Hills District and surrounding areas, many properties accommodate multiple zones: a dining alfresco area separate from a lounge section, perhaps a garden feature. Others demand clever spatial planning within tighter constraints.
Document your priorities in writing. If entertaining matters, proximity to the kitchen and weather protection become critical. For a private retreat, privacy screening and subtle lighting take priority. This clarity becomes your design compass when evaluating options later.
Assess Your Site Conditions and Climate
Your block's orientation, existing trees, soil type, and exposure to coastal winds determine what materials will last and which plants will thrive.
Start with aspect. North-facing areas in Sydney receive intense afternoon sun and heat. South-facing areas stay cooler and shadier. East-facing gets morning sun and afternoon shade. West-facing is the opposite. This directly affects paving material selection, plant choice, and shade structure positioning.
Soil assessment matters equally. Clay-heavy soils common in the Hills District hold water and can cause drainage problems if not managed. Sandy soils drain quickly but don't retain moisture or nutrients. Dig a hole, fill it with water, and observe how quickly it drains. This simple test reveals what you're working with for both hardscaping drainage and plant survival.
Coastal properties face salt spray and strong winds that degrade timber faster, corrode metal fittings, and stress plants. Material durability becomes non-negotiable. Treated timber, stainless steel fixings, and salt-tolerant native plants aren't luxuries, they're necessities.
Greater Sydney's summer storms can be intense. Winter frosts in elevated Hills District areas can damage tender plants. Your design needs to accommodate these realities.
Understanding the Professional Landscape Design Process
When you engage a landscape design and construction company, you're investing in expertise that translates your vision into a buildable, functional reality.
Concept and Site Analysis
The designer visits your property, measures the space, photographs existing features, and gathers information about your brief. They assess sight lines, existing trees, slope, access, and utilities. They ask detailed questions about your lifestyle, entertaining habits, budget, and timeline. Thorough site analysis is the foundation for everything that follows.
Preliminary Design and 3D Visualisation
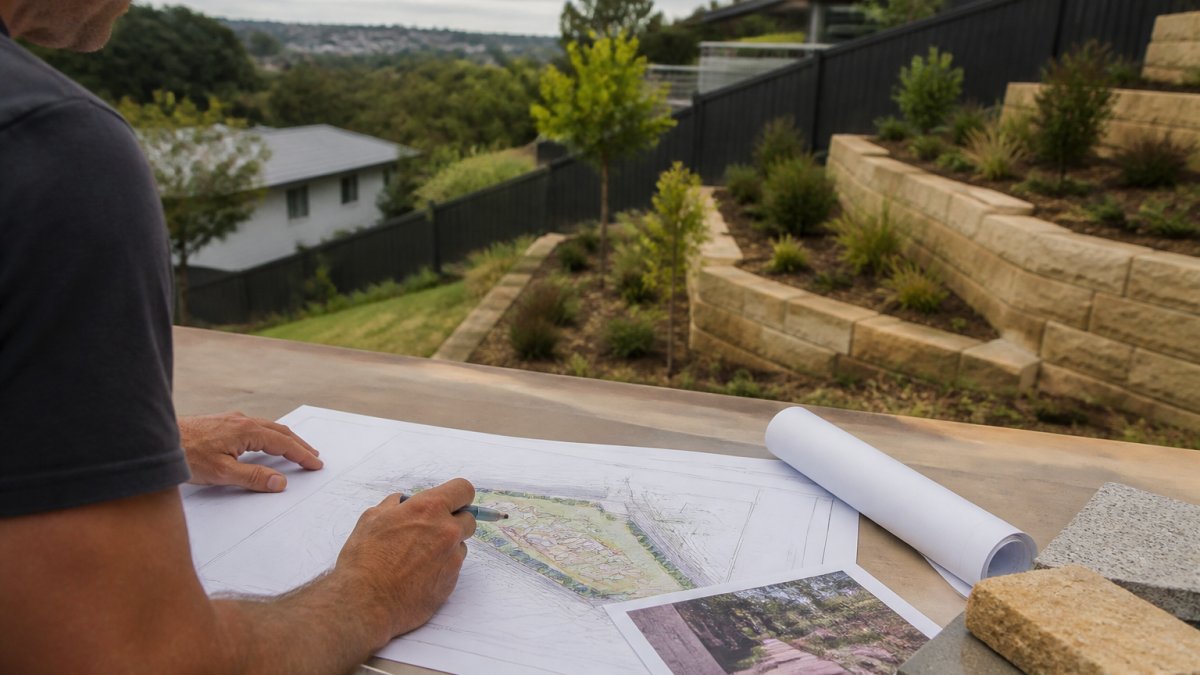
The designer translates your requirements and site analysis into preliminary sketches, then progresses to 3D digital models. This lets you walk through the space virtually, test sightlines, and identify issues before construction. You can request adjustments on screen rather than on site.
Design Refinement and Documentation
Once you're happy with the 3D concept, the designer creates detailed construction drawings specifying materials, dimensions, levels, drainage, and construction methodology. This documentation is essential for accurate quoting and construction execution, and required for council approval if your project needs development approval.
Material and Specification Selection
The designer recommends specific materials for paving, edging, timber, and plants based on your site conditions, climate, and aesthetic preferences. Not all pavers perform equally in Sydney's climate. Not all timber species suit coastal exposure. This is where experience prevents costly failures.
Construction Administration
Once construction begins, the designer typically oversees the build to ensure it matches the approved design. When you work with an experienced landscaper offering both design and construction services, you benefit from continuity, the person who designed your space builds it.
This structured process prevents the common pitfall of starting construction without clarity, which almost always leads to budget overruns and disappointing results.
Outdoor Living Area Council Approval and DA Requirements
Whether your outdoor living space requires development approval depends on its size, type, and your local council's requirements. This is essential to understand before committing to design or budget.
When Development Approval is Required
Most councils in Greater Sydney require development approval for structures beyond a certain size or type. A small timber deck under 10 square metres might be exempt. A pergola with a roof might not be. An outdoor kitchen with fixed appliances typically requires approval. An alfresco area with a permanent roof structure almost certainly does.
Rules vary between councils. Hornsby Shire, Baulkham Hills Shire, The Hills Shire, and other local authorities have different thresholds and requirements.
What Councils Typically Assess
When you submit a development application, councils evaluate setback compliance, height limits, site coverage, amenity impacts on neighbours, drainage and stormwater management, and parking and access. For flood-prone areas, additional flood-related assessment applies. Heritage conservation areas require heritage considerations.
The Practical Approach
Before investing heavily in design, contact your local council or ask your designer to clarify what you need. Many councils provide online guides or fact sheets. Some offer pre-lodgement meetings where you can discuss your concept with a planner before formal submission.
If your project requires approval, factor this into your timeline. Development assessment typically takes 8-12 weeks, sometimes longer if the council requests additional information. An experienced landscape designer familiar with your local council's requirements will build compliance into the design from the start, avoiding costly revisions.
Selecting Hardscaping Materials for Backyards
Hardscaping, paving, edging, steps, and structural elements, represents your largest material investment. Choosing durable, appropriate materials for Sydney's climate is critical.
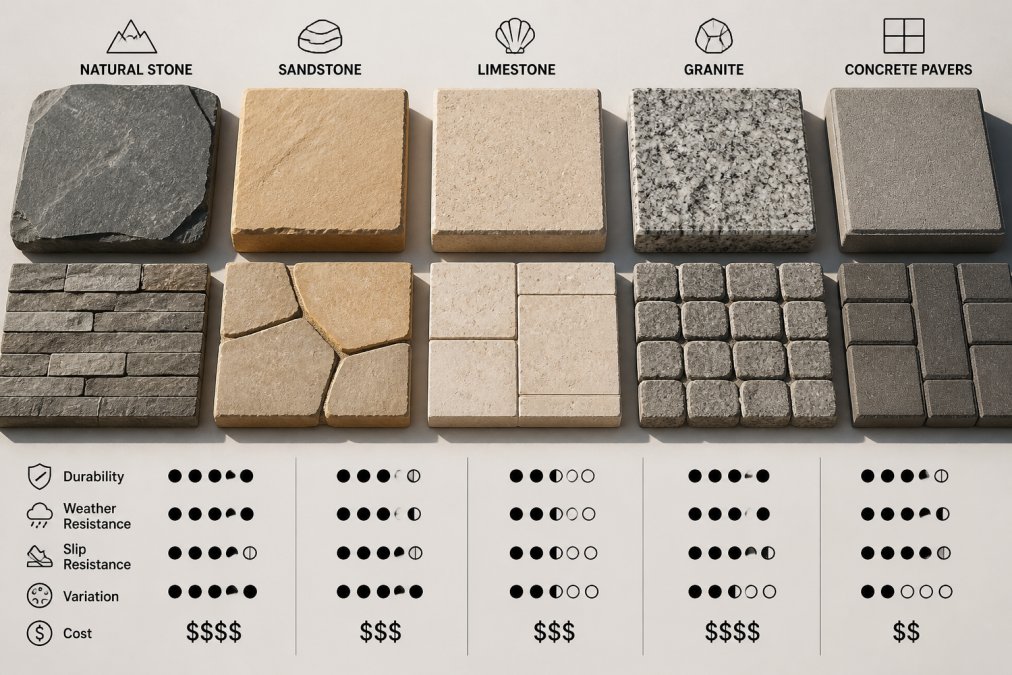
Paving Options and Performance
Concrete is affordable and versatile. Exposed aggregate finishes offer texture and slip resistance. Coloured concrete coordinates with your home. Stamped concrete mimics natural stone at lower cost. Concrete can crack in freeze-thaw cycles and stain, but maintenance is straightforward.
Natural stone, bluestone, sandstone, granite, offers durability and aesthetic appeal. Bluestone is popular in Sydney, hardwearing and elegant. Sandstone is softer and more prone to weathering, particularly in coastal areas where salt spray accelerates degradation. Granite is extremely durable but more expensive. Natural stone requires periodic sealing to prevent staining and water penetration.
Porcelain pavers are engineered to mimic stone or timber appearance while delivering superior durability. They're non-porous, resist staining, and handle freeze-thaw better than natural stone. They're more expensive than concrete but often cheaper than quality natural stone, and perform particularly well in coastal environments.
Timber decking adds warmth and visual interest. Pressure-treated pine is affordable but requires regular maintenance. Hardwoods like spotted gum or jarrah are more durable but significantly more expensive. Composite decking requires less maintenance than timber but costs more upfront. In coastal areas, timber durability is a serious consideration.
Drainage Considerations
Permeable paving allows water to drain through rather than pooling on the surface. This is increasingly preferred for stormwater management and often required by councils. It prevents puddles and reduces stormwater runoff.
Slope is essential. Your paving should slope gently away from structures (typically 1:100 to 1:50) to shed water. Without proper slope, water pools and accelerates degradation.
Colour and Aesthetic Coordination
Choose colours that coordinate with your home's exterior and suit the landscape setting. Light colours reflect heat and stay cooler underfoot but show dirt more readily. Dark colours absorb heat and hide dirt better but can feel heavy. Mid-tone greys and warm earth tones are versatile and forgiving.
Consider how colours weather. Understanding material discolouration before installation prevents disappointment later.
Planning Alfresco Area Drainage Solutions
Water management is often overlooked in outdoor living space design, then becomes expensive to fix. Getting drainage right from the start prevents pooling, foundation damage, and failed plantings.
Surface Drainage
Your alfresco area should slope gently away from structures. A 1:100 slope is barely noticeable to the eye but effective for shedding water. This is the simplest and most effective drainage strategy.
Where slope isn't sufficient, a shallow channel or swale can direct water away from the entertaining area. These can be subtle, a planted swale that's part of the landscape design, or more formal, a linear drainage channel.
Subsurface Drainage
If your site has poor natural drainage or clay soil, subsurface drainage becomes necessary. French drains, trenches filled with gravel and perforated pipe, collect water and direct it to a suitable outlet. These are typically installed around the perimeter of structures or in low-lying areas. They're invisible once installed and highly effective.
For larger areas or significant stormwater volumes, a proper stormwater system with pipes and sumps may be required. Professional design and engineering matter here.
Integration with Softscaping
Planted areas can serve drainage functions. Rain gardens, shallow planted depressions, capture and filter stormwater, reducing runoff while adding landscape interest. Native plants suited to wet conditions can thrive in these areas.
Council Requirements
Most councils require a stormwater management plan for significant outdoor living areas. This plan demonstrates how stormwater is captured, managed, and disposed of. An experienced designer incorporates this into the design from the start.
Integrating Shade, Lighting and Entertaining Areas
Shade and lighting transform an outdoor living space from daytime-only into a genuinely usable extension of your home.
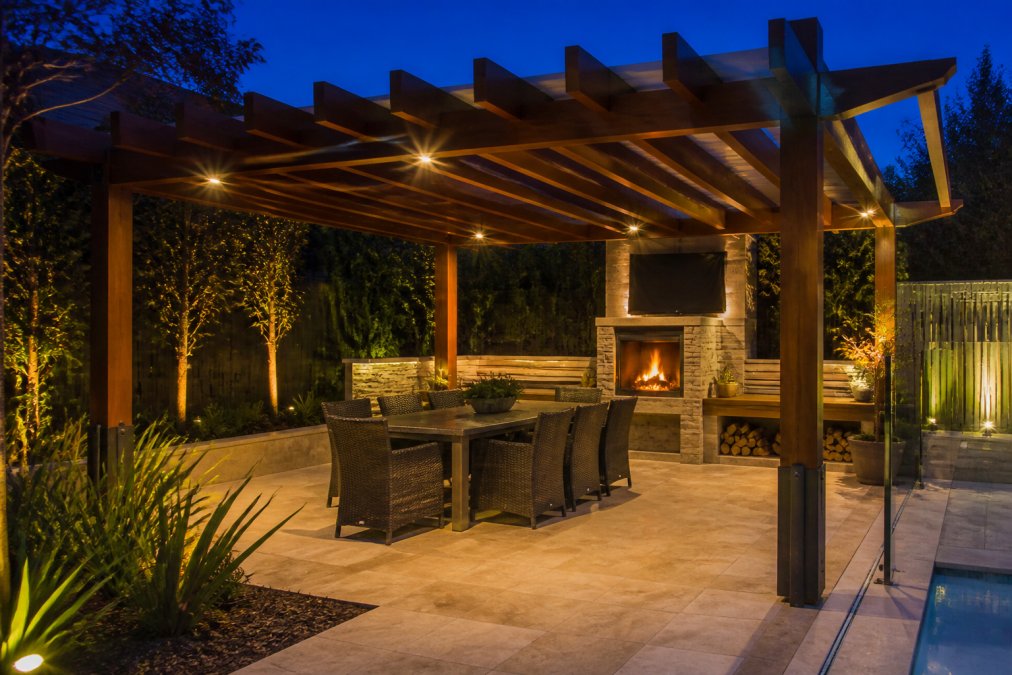
Shade Structures
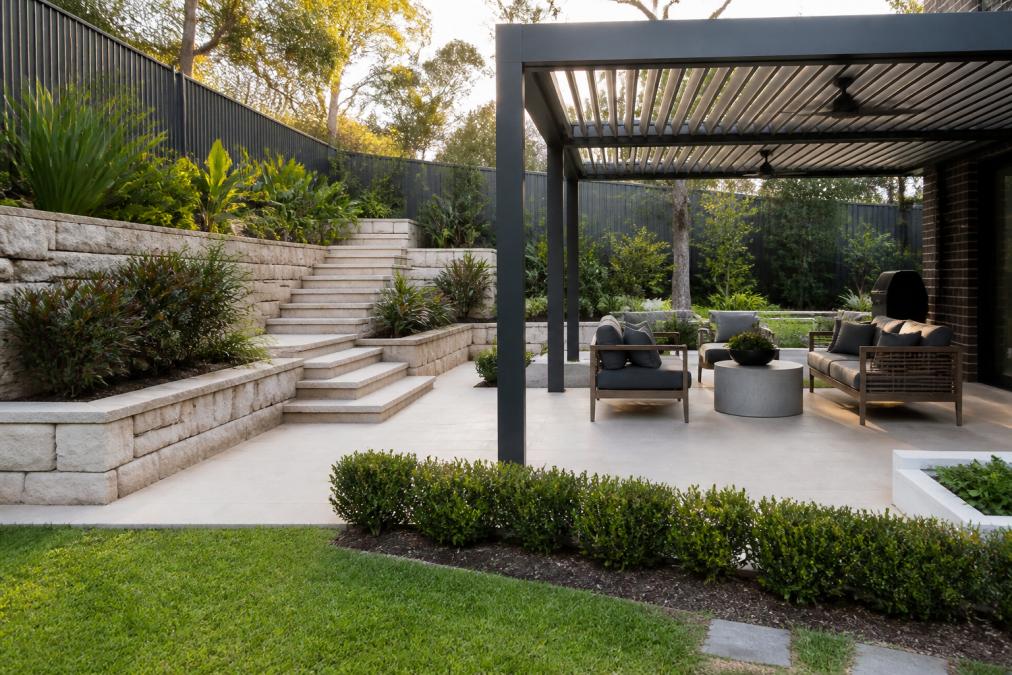
A pergola provides partial shade and dappled light comfortable in summer but allowing winter sun through. Open-sided pergolas offer flexibility. Pergolas with retractable shade cloths or climbing vines provide adjustable shade. A solid roof provides complete protection but blocks winter sun entirely, which matters in Sydney's climate where winter sun is valuable.
Shade sails are modern, flexible, and can be angled to provide shade where needed. They're visually lighter than solid structures and work well in contemporary designs.
Existing trees are your best asset. A mature tree provides natural shade, creates habitat, and costs nothing to install. Design your entertaining area to work with existing trees rather than removing them.
Lighting Design
Ambient lighting creates atmosphere. Soft uplighting on trees, subtle path lighting, and overhead fixtures create an inviting evening space. Avoid harsh downlighting that eliminates all shadows.
Task lighting, brighter lights over dining tables or kitchen areas, allows evening entertaining and cooking. These can be dimmed when ambient atmosphere matters more.
Feature lighting highlights landscape elements, adding visual interest and creating focal points. Smart lighting systems allow you to adjust colour temperature and brightness, creating different moods. Warm white light (2700K) feels inviting and intimate. Cooler light (4000K) is better for task areas.
Layout and Zoning
Separate your entertaining area into zones: a dining zone near the kitchen, a lounge zone with seating and shade, a garden viewing area. This zoning creates visual interest and allows different activities simultaneously. Pathways connecting zones should be clear and well-lit.
Furniture and Softscaping
Quality outdoor furniture designed for outdoor use is worth the investment. Cheap furniture degrades quickly and looks tired. Coordinated furniture creates a cohesive look.
Planting around the entertaining area softens hardscaping, creates privacy, and adds colour and texture. Native plants suited to your site conditions require less maintenance than exotic varieties. Layered planting, tall plants for privacy, mid-height shrubs for structure, ground covers for interest, creates depth and visual appeal.
Conclusion: Bringing Your Outdoor Living Space to Life
Designing an outdoor living space that genuinely works requires clarity on how you'll use it, honesty about your site's constraints, and commitment to proper process. Rushing the design phase to start construction faster almost always costs more in revisions and regrets.
The most successful outdoor living spaces balance aesthetics with functionality. They work with the site rather than against it. They're built from durable materials appropriate to the climate. They're designed with council compliance in mind from the start.
At FDSS Landscaping Services, we work through this entire process with you, from initial concept and 3D design through construction and completion. We're familiar with Hills District and Greater Sydney site conditions, council requirements, and material performance in this climate. We manage the complexity so you get a finished space that's genuinely usable and built to last.
If you're considering an outdoor living space renovation or new build, request a landscaping quote from FDSS Landscaping Services and let's discuss your vision, site, and requirements in detail.
Frequently Asked Questions
Do I need council approval for an outdoor living space?
Many outdoor living structures require development approval depending on their size, type and location. Pergolas, decks, paving and retaining walls may need DA or a complying development certificate. Requirements vary by council area. It's essential to check with your local council before starting work. Some councils have specific guidelines for setbacks, height limits and materials. Professional landscape designers familiar with local regulations can guide you through the approval process and ensure your design complies.
What materials work best for outdoor flooring in humid coastal climates?
Coastal environments require durable hardscaping materials that resist salt air, moisture and temperature fluctuations. Porcelain pavers, composite decking, and treated timber are popular choices. Porcelain offers excellent durability and low maintenance. Composite materials resist warping and fading. If using natural stone, choose non-porous varieties. Ensure proper drainage beneath all outdoor flooring to prevent water pooling. Weatherproofing treatments extend the life of timber significantly. Your landscape designer can recommend materials suited to your specific coastal location and maintenance preferences.
What is the typical process for professional landscape design?
Professional landscape design typically begins with a detailed site assessment, measuring your space and understanding your climate, soil and existing features. The designer then develops a spatial plan showing zones for entertaining, dining, relaxation and greenery. 3D visualisations help you see the final result before construction. This is followed by detailed construction drawings and specifications for materials, drainage and hardscaping. The design process considers council requirements, budget and functionality alongside aesthetic appeal. Working with an experienced landscape designer ensures your outdoor space is both beautiful and practical.
How can I maximise a small backyard for outdoor living?
Small spaces benefit from strategic zoning and multi-functional design. Vertical elements like pergolas and privacy screening create the illusion of space. Built-in seating and storage reduce clutter. Decking or paving in lighter colours make areas feel larger. Careful plant selection, using native species and layering heights, adds greenery without overwhelming the space. Ambient lighting extends usability into evening hours. Consider whether you need both dining and entertaining areas, or if one multifunctional zone works better. A professional designer can optimise your layout to maximise functionality and visual appeal in compact spaces.
| Design Phase | Key Deliverable | Timeline |
|---|---|---|
| Site Analysis | Site measurements, photos, brief documentation | 1-2 weeks |
| Preliminary Design | 3D concept and visualisation | 2-4 weeks |
| Design Refinement | Detailed construction drawings and specifications | 2-3 weeks |
| Council Approval | Development application submission and approval | 8-12 weeks |
| Construction | Build to completion | 4-12 weeks |